
How to Stain and Finish a Concrete Patio Step-by-Step
Reading time: 14 minutes
Ever looked at your dull, grey concrete patio and thought, “There has to be a better version of this”? You’re absolutely right — and the transformation doesn’t require tearing everything up and starting over. Staining and finishing a concrete patio is one of the highest-ROI home improvement projects you can tackle in 2026, with homeowners reporting an average cost recovery of 65–80% at resale according to recent remodeling value reports.
The good news? This is a project well within reach of a committed DIYer or a budget-conscious homeowner willing to hire selective help. The not-so-good news? There are a dozen ways to mess it up if you skip the prep work or choose the wrong products for your climate and surface conditions.
This guide cuts through the noise. Whether you’re working with a weathered 10-year-old slab or a freshly poured pad, you’ll find a clear, honest roadmap from surface prep to final sealer coat — with real product comparisons, timing advice, and the mistakes most people make that you won’t.
Table of Contents
- Why Stain Your Concrete Patio?
- Understanding Your Stain Options
- Tools and Materials You’ll Need
- The Most Critical Step: Surface Preparation
- Applying the Stain Step-by-Step
- Choosing and Applying the Right Finish
- Common Challenges and How to Overcome Them
- Frequently Asked Questions
- Your Patio Transformation Roadmap
Why Stain Your Concrete Patio?
Bare concrete isn’t just aesthetically underwhelming — it’s also more vulnerable to the elements. Unsealed, untreated concrete absorbs moisture, oil, and organic stains, making it harder to maintain year after year. A stained and sealed concrete surface, by contrast, resists UV degradation, freeze-thaw cycling, and oil penetration far more effectively.
In 2026, outdoor living continues to dominate home renovation priorities. According to the American Institute of Architects’ 2025 Home Design Trends Survey, outdoor living spaces ranked as the #1 most requested feature in residential renovations for the third consecutive year. Your patio is no longer a utility slab — it’s an extension of your living space, and it deserves the same design attention as your interior floors.
Beyond aesthetics, the financial case is compelling. A professional concrete staining job averages $2–$6 per square foot when done by a contractor in 2026, while a quality DIY project costs between $0.50–$1.75 per square foot in materials. Compare that to full concrete replacement at $6–$12 per square foot, or pavers at $15–$30 per square foot installed, and the math is obvious.
“The single biggest mistake homeowners make is treating concrete staining like painting a wall. Concrete is a living, reactive material — it behaves differently depending on age, porosity, and prior treatments. Respect the prep process, and the results will astonish you.” — Marcus Delray, Decorative Concrete Association Certified Installer, 2025
Understanding Your Stain Options
Not all concrete stains are created equal. Your choice fundamentally shapes not just the color, but the durability, application method, and the character of your finished surface. There are two primary categories, each with distinct personalities.
Acid-Based Stains: The Authentic Character Option
Acid stains — typically hydrochloric or phosphoric acid combined with metallic salts — chemically react with the calcium hydroxide in cured concrete. This reaction creates permanent, translucent color variations that genuinely cannot peel, chip, or fade in the traditional sense because the color becomes part of the concrete itself.
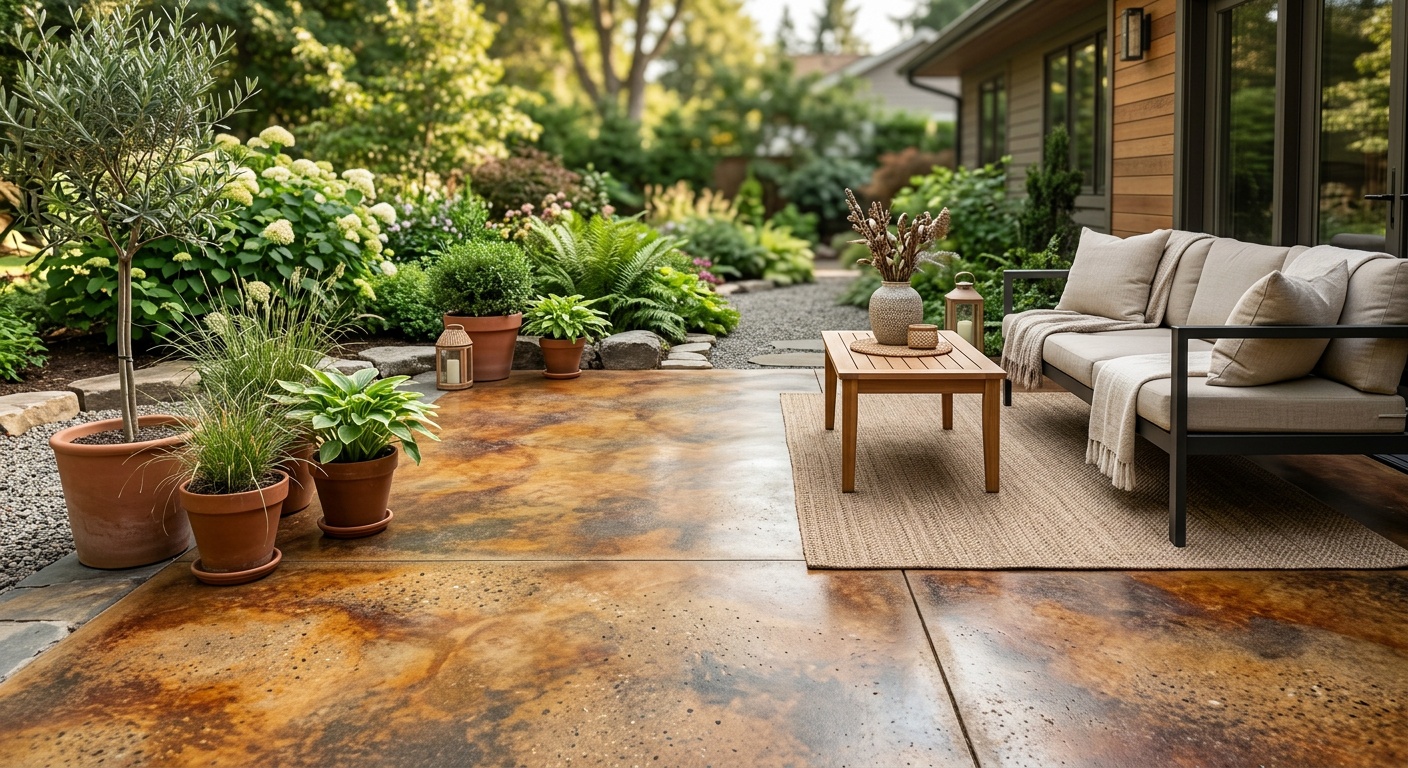
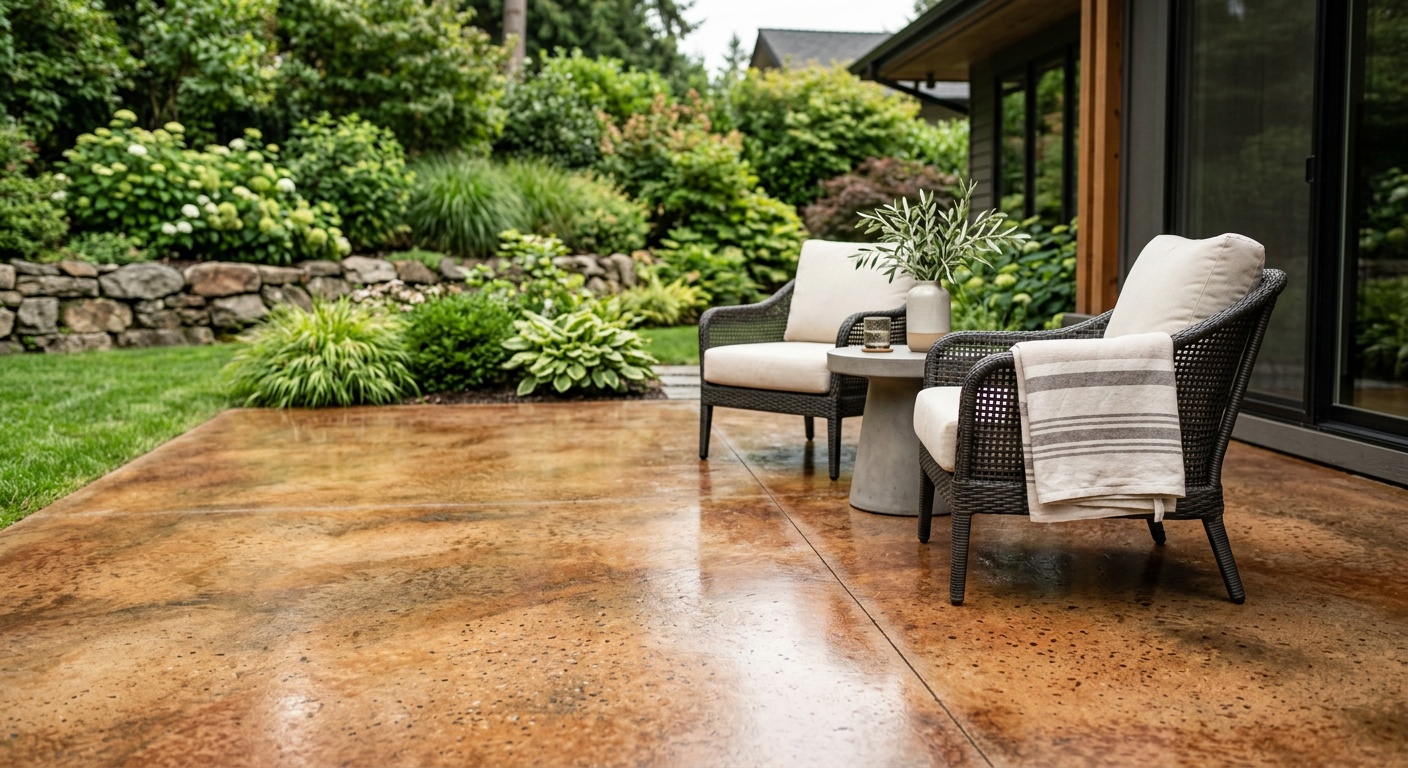
The colors available in acid stains are naturally earthy: rich browns, warm tans, terra cottas, blue-greens, and charcoal tones. The mottled, variegated finish often mimics natural stone or aged leather — a look that many homeowners find far more sophisticated than a uniform painted appearance.
Key characteristics of acid stains:
- Permanent chemical bond — won’t peel or chip
- Highly variable results depending on concrete’s mineral composition
- Require neutralization and careful cleanup (acid safety precautions apply)
- Limited color palette (earth tones dominate)
- Best suited for patios with good structural integrity and no coatings
Real-world example: A homeowner in Austin, Texas, applied a Kemiko Stone Tone acid stain to a 15-year-old back patio in early 2025. The result was a rich, marbled terra cotta finish with natural variation across the surface. Total material cost for the 320 sq ft patio: approximately $185. The acid’s reaction with the older, mineral-rich concrete produced deeper, more complex color than it would on a new slab.
Water-Based (Acrylic) Stains: The Predictable, Versatile Option
Water-based concrete stains are pigment suspensions that penetrate the concrete’s pores and bond mechanically rather than chemically. They offer a dramatically broader color spectrum — essentially any color you can imagine — and deliver more predictable, consistent results.
They’re also considerably more beginner-friendly. There’s no acid to neutralize, no chemical reaction to manage, and far more margin for error during application. The tradeoff is that water-based stains, while penetrating, don’t bond quite as permanently as acid stains and rely more heavily on a quality topcoat sealer to maintain longevity.
Key characteristics of water-based stains:
- Unlimited color options including blues, greens, reds, and custom blends
- Consistent, more uniform appearance
- Easier application and cleanup
- No hazardous acid handling required
- Slightly less permanent than acid stains; sealer is essential
Tools and Materials You’ll Need
Before you open a single container, having the right equipment assembled saves you from mid-project supply runs that always happen at the worst possible moment. Here’s a comprehensive checklist organized by project phase.
Surface Preparation:
- Pressure washer (minimum 3,000 PSI recommended)
- Concrete degreaser or TSP cleaner
- Acid etching solution OR concrete grinder/scarifier (rental ~$60/day in 2026)
- Stiff-bristle scrub brush and floor scrubber
- Wet/dry shop vacuum
- Plastic sheeting and painter’s tape for masking
Stain Application:
- Your chosen concrete stain (calculate coverage: typically 200–300 sq ft per gallon)
- Pump-up garden sprayer (for acid stains) or roller/brush system (for water-based)
- Acid-resistant nylon bristle brushes for detail work
- Rubber gloves, eye protection, and respirator (essential for acid stains)
- Baking soda and water solution (for acid stain neutralization)
Finishing and Sealing:
- Concrete sealer (acrylic, epoxy, or polyurethane — more on this below)
- Paint roller with 3/8″ nap cover
- Extension pole
- Non-slip additive for sealer (critical for outdoor surfaces)
- Floor buffer/polisher (optional, for high-gloss finishes)
The Most Critical Step: Surface Preparation
Here’s the straight talk: 70% of concrete staining failures trace back directly to inadequate surface preparation. The stain doesn’t fail. The process fails. A concrete surface that hasn’t been properly cleaned, etched, and dried will reject stain unevenly, produce blotchy results, or cause premature sealer delamination.
Step 1: Clean the Concrete Thoroughly
Start with a thorough pressure washing — and don’t skip the degreaser. Any oil, grease, paint, or sealant already on the surface will block penetration. Apply a concrete degreaser liberally, scrub with a stiff brush, and rinse completely. For older patios with embedded oil stains (common near BBQ areas or vehicles), you may need to apply degreaser two or three times.
If your patio has existing paint, epoxy coating, or a prior sealer, this is where many projects get complicated. These coatings must be removed before staining. Options include chemical strippers (effective but labor-intensive), mechanical grinding (fastest for large areas), or shot blasting (professional-grade). Don’t attempt to stain over an existing coating — you’ll be sealing in the problem, not solving it.
Step 2: Etch the Surface
Etching opens the pores of the concrete and creates a slightly rough profile that allows stain to penetrate properly. You have two approaches:
Acid etching: A diluted muriatic acid solution (typically 1 part acid to 10 parts water) applied evenly, allowed to fizz and react for 5–10 minutes, then thoroughly rinsed and neutralized with a baking soda solution. The surface should have a texture resembling medium-grit sandpaper after etching. Wear full protective gear — this step is not optional safety-wise.
Mechanical profiling: Using a concrete grinder or diamond cup wheel. Preferred for very smooth, power-troweled concrete or surfaces where acid etching hasn’t produced adequate profile. Rental equipment is widely available at hardware stores in 2026 and is worth it for larger patios.
The water drop test: After prep is complete, drop a small amount of water on the surface. If it beads up, the surface is still too sealed or dirty for good stain penetration. If it absorbs within a few seconds, you’re ready.
Step 3: Allow Proper Drying Time
This is where impatient DIYers get into trouble. After washing and etching, the concrete must be completely dry — typically 24–48 hours in warm, dry conditions. In humid climates or during cooler months, allow 48–72 hours. Applying stain to even slightly damp concrete causes blotching, whitening, and adhesion failures. Use a moisture meter if you’re uncertain; concrete moisture content should be below 4% before staining.
Applying the Stain Step-by-Step
With your surface prepped and dry, the actual staining process is more about patience and technique than physical effort. Temperature and humidity matter enormously here: ideal conditions are 50–90°F with relative humidity below 70%. Avoid application in direct harsh sunlight, which causes stain to dry too fast and create lap marks.
Application process for acid stains:
- Load a pump sprayer with your acid stain and apply in a circular, overlapping motion — never spray in straight lines, which creates visible patterns. Work in 4–6 foot sections.
- Allow the reaction to develop for 2–4 hours. You’ll see the surface darkening and developing color variation as the chemical reaction occurs. Don’t panic if it looks uneven at this stage — that’s normal and will even out.
- Apply a second coat if deeper color is desired. Wait until the first coat has fully reacted before applying the second.
- Neutralize the acid: Mix approximately 1 cup of baking soda per gallon of water and scrub the entire surface. You’ll see fizzing as remaining acid is neutralized. Rinse thoroughly with clean water.
- Remove residue: Some stain products leave a light powdery residue after neutralization. Scrub with a stiff brush and water, then rinse. Allow to dry completely before sealing.
Application process for water-based stains:
- Cut in edges with a brush along walls, borders, and expansion joints first.
- Apply with a roller in thin, even coats using a consistent wet-edge technique to avoid lap lines.
- Allow first coat to dry completely — typically 2–4 hours.
- Apply second coat for full color saturation. Water-based stains almost always require two coats minimum for proper depth of color.
- Inspect for missed spots or uneven areas before proceeding to sealing.
Choosing and Applying the Right Finish
The sealer you choose determines how your patio looks, how durable it is, how slippery it may be when wet, and how much maintenance it requires over the coming years. This decision deserves serious thought — particularly for outdoor applications where UV exposure, freeze-thaw cycling, and foot traffic are ongoing stressors.
| Sealer Type | Durability | Appearance | Recoat Interval | Avg. Cost/Gal (2026) |
|---|---|---|---|---|
| Acrylic Sealer | Moderate (2–3 years) | Low to high gloss | 1–2 years | $35–$55 |
| Epoxy Coating | High (5–7 years) | High gloss | 5–7 years | $60–$95 |
| Polyurethane | Very High (7–10 years) | Satin to gloss | 5–10 years | $70–$120 |
| Penetrating Silane/Siloxane | High (5–8 years) | Natural/matte | 5–8 years | $55–$90 |
| Water-Based Polyurethane | High (5–8 years) | Semi-gloss | 4–6 years | $65–$100 |
For outdoor patios in 2026, polyurethane or water-based polyurethane sealers represent the best balance of UV resistance, durability, and color enhancement. Acrylic sealers are economical but require more frequent reapplication. Epoxy, while very durable, is susceptible to UV yellowing outdoors and is better suited to garage floors or covered patios.
Critical outdoor consideration — slip resistance: Any glossy sealer creates a dangerously slippery surface when wet. Always add a non-slip additive (aluminum oxide or polymer grit) to your topcoat sealer for outdoor applications. This is not optional — it’s a safety baseline.
Sealer application process:
- Ensure the stained surface is completely dry — minimum 24 hours after final stain coat.
- Apply the first sealer coat thinly and evenly with a roller. Thin coats bond better than thick ones.
- Allow to cure per manufacturer’s instructions (typically 4–8 hours between coats).
- Apply second coat. Add non-slip additive to the final coat only.
- Allow full cure before light foot traffic (24 hours) and furniture placement (72 hours).
Common Challenges and How to Overcome Them
Challenge 1: Blotchy, Uneven Color
Uneven stain absorption is the most common complaint — and it’s almost always a prep problem. Areas with different porosity absorb stain at different rates, creating visible patchwork. If you notice this mid-application, don’t panic: additional coats can help even out the color. For existing blotchiness post-cure, a second coat of stain applied in the light areas using a brush (feathering it in at the edges) often corrects the issue before sealing.
Prevention is better than cure: the water drop test described in the prep section helps identify porosity variations before you start staining. Areas that absorb water very rapidly may need to be addressed with a concrete densifier before staining to even out porosity.
Challenge 2: Sealer Whitening or Blushing
A milky, white haze in the sealer after application is almost always caused by moisture — either in the concrete, in humid air, or from applying sealer over a still-damp surface. This is particularly common in climates with high humidity or when working in the morning before dew has evaporated.
Minor blushing in acrylic sealers can sometimes be corrected by applying a fresh thin coat of sealer over the affected area on a dry day, which reactivates and blends the existing coat. Severe blushing may require complete sealer removal and reapplication. Again: prevention through patience and proper drying time is infinitely easier.
Challenge 3: Stain Not Penetrating Properly
If your acid stain is pooling on the surface rather than being absorbed, the concrete has either been previously sealed, or surface contamination remains. Stop the application immediately, clean the surface again, and address the barrier. Trying to force stain through an unseen coating just wastes material and creates a mess that’s harder to remediate.
Quick scenario: A homeowner in Denver purchased a home in early 2026 and wanted to stain the existing back patio. After applying acid stain, they noticed it was sitting on top of the surface in glossy pools rather than penetrating. Investigation revealed the previous owner had applied a silane sealer two years prior — invisible to the naked eye but completely blocking stain penetration. Solution: chemical stripper application, mechanical grinding of the top layer, re-etching, and then successful stain application. The extra steps added one day to the project but ultimately saved the surface.
Concrete Stain Performance Comparison
Here’s a visual comparison of how different stain types rate across four key performance metrics — based on aggregated 2025–2026 contractor satisfaction surveys and product testing data.
Stain Performance Ratings (Out of 100)
Frequently Asked Questions
How long does a stained concrete patio last before it needs to be redone?
The stain itself — particularly acid stain — is essentially permanent because it becomes part of the concrete. What requires periodic maintenance is the sealer coat, not the stain. A quality polyurethane sealer on an outdoor patio typically lasts 5–8 years before needing reapplication in moderate climates, or 3–5 years in harsh freeze-thaw environments or high UV exposure areas. When the sealer begins to show wear (dullness, water no longer beads, minor scuffing), apply a fresh thin coat of the same sealer product to restore protection without having to redo the entire project.
Can I stain a concrete patio that has cracks or surface damage?
Minor hairline cracks can be stained and sealed without issue — the stain will highlight them somewhat, adding to the natural character of the surface. However, structural cracks or significant spalling should be repaired with a concrete crack filler or resurfacing compound before staining. Fill cracks, allow the repair to cure fully (minimum 28 days for new concrete repairs), and then sand smooth before proceeding with prep and staining. Note that repaired areas may not absorb stain identically to the surrounding concrete, potentially showing as slightly different tones — this is normal and typically acceptable within the natural variation of stained concrete.
Is it possible to change the color of a previously stained concrete patio?
The answer depends on whether your existing stain is acid-based or water-based. Acid stains create a chemical bond that cannot be removed by stripping — your options are to apply a darker acid stain over the existing one (going lighter is not possible), apply a water-based stain over the top, or use an opaque concrete coating to completely change direction. Water-based stains can sometimes be lightened by grinding or stripped chemically, then restained in a different color. Going darker is always easier than going lighter. If you’re unsatisfied with an existing acid stain color, consult with a decorative concrete professional before attempting DIY color correction — it’s an area where mistakes are costly to fix.
Your Patio Transformation Roadmap: From Grey to Great
You now have everything you need to approach this project with confidence rather than guesswork. Let’s consolidate this into a clear action sequence you can follow from this weekend forward.
Your 5-Step Transformation Roadmap:
- Assess and plan (Day 1): Evaluate your concrete’s condition, test for existing sealers (water drop test), measure your square footage, and choose your stain type based on your color goals and skill comfort level. Order materials with a 10% overage buffer.
- Prep aggressively (Day 2–3): Clean, degrease, etch, and dry. Budget two full days for this phase on patios over 200 sq ft. Don’t rush the drying window — check moisture levels before proceeding.
- Stain with patience (Day 4): Apply stain in thin, even layers. For acid stains, embrace the variation. For water-based, maintain a wet edge. Two coats are almost always better than one heavy coat.
- Seal properly (Day 5–6): Choose your sealer based on desired sheen and durability timeline. Add non-slip grit to the final coat. Apply two thin coats with a roller, not one thick coat.
- Maintain annually: Clean with a pH-neutral cleaner, inspect sealer condition each spring, and spot-recoat worn areas before they compromise the stain beneath.
In 2026, where outdoor living spaces have become genuine lifestyle investments rather than afterthoughts, a beautifully finished concrete patio does more than improve curb appeal — it transforms how you use and experience your home’s exterior. The technology in stains and sealers available today is genuinely superior to even five years ago, with improved UV resistance, eco-friendly water-based formulations, and extended durability profiles.
Here’s your challenge: Stand on your patio right now and picture it with the rich, natural variation of a well-executed acid stain in warm terra cotta — or a deep slate blue water-based finish complementing your home’s exterior. That transformation is 4–6 days of focused work and a few hundred dollars in materials away. What’s stopping you from making it happen this season?
Article reviewed by Clara Jensen, Traditional Architectural Design & Heritage Renovation Consultant, on July 15, 2026